
I have several Raspberry Pi and in all of them I have used the Ubuntu distro. However I also wanted to use Debian as it is one of the most used Linux distros. Besides Ubuntu is based on Debian, so I guess I will feel confortable with it.
Debian vs Ubuntu
Debian is more stable than Ubuntu, indeed, it is one of the most stable Linux. The releases in Debian are not as frequent as in Ubuntu, and the software updates in Debian usually don’t have the latest versions. Besides, Debian is lighter because the software it has is the basic one.
What is needed to install Debian in a Raspberry Pi?
- A Raspberry Pi 4 board
- A USB-C cable and its power adapter for Raspberry Pi 4
- A MicroSD Card (recommended 16 Gb or more)
- A PC for flashing the MicroSD Card
- A MicroSD Card reader in your PC
- A screen with a HDMI mini cable
- RJ45 Ethernet cable
- An USB-A keyboard
Download Software
Debian image
The first step is to download the image of Debian for the Raspberry Pi. It is a Debian image specifically prepared for Raspberry. In this site, you’ll find a link to Download tested Debian images.
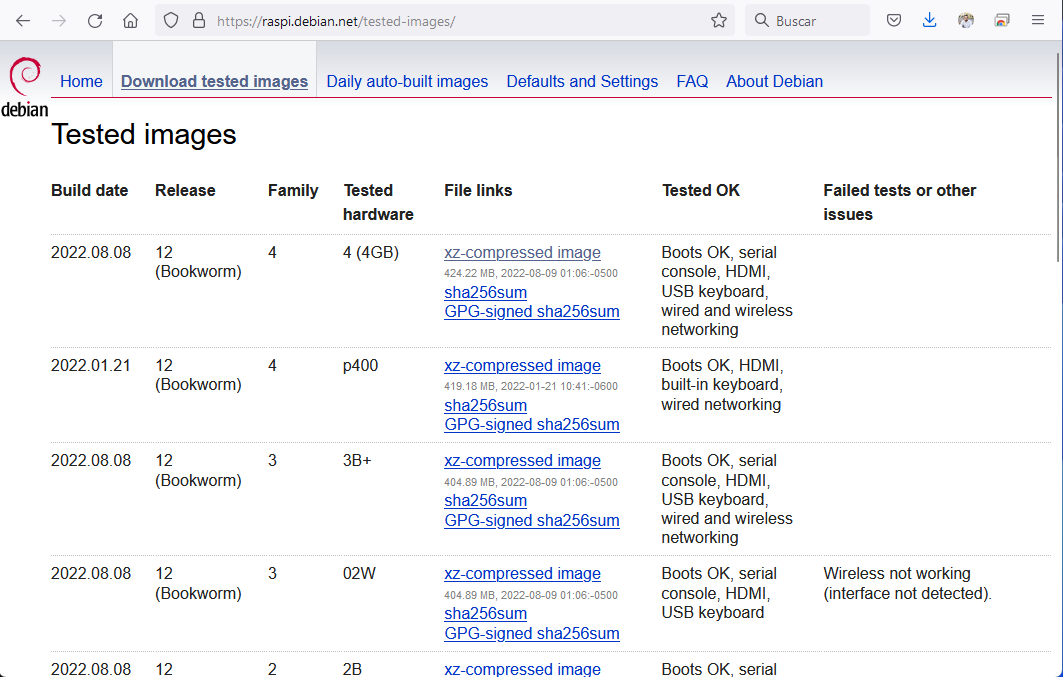
In the Debian images page, there are several images ordered by date. I suggest you to select the newest one. You have to download the xz-compressed image file.
Raspberry Pi Imager
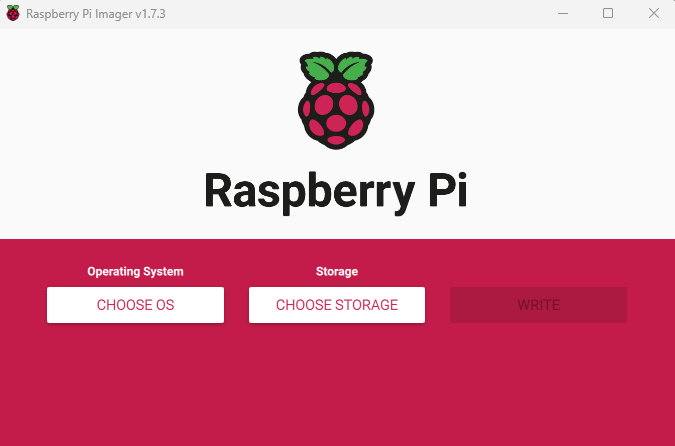
The next step is to download the Raspberry Pi Imager software. This will be used to flash the MicroSD Card with the Debian image. You can download it from the Official Raspberry Pi Foundation website. It is available for Windows, Mac and Linux. Once downloaded, install the software.
Once the Raspberry Pi Imager is installed in your PC, start the program and you’ll see this screen:
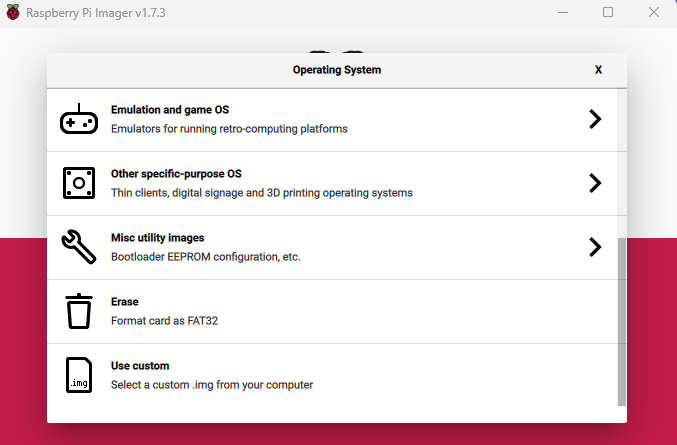
Operating System
Choose OS -> Use Custom -> Select the img.xz file downloaded previously from Debian images page.
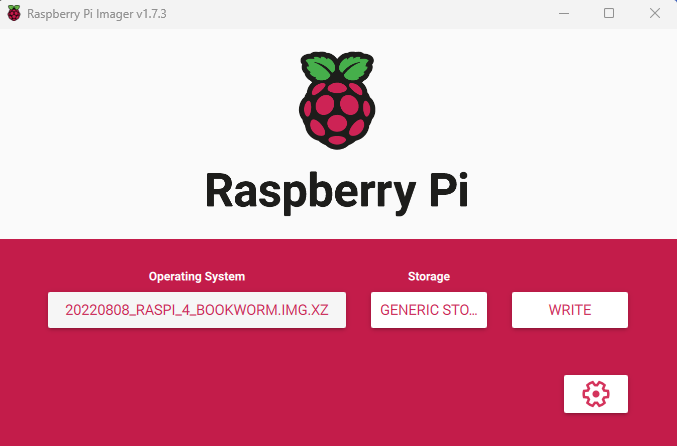
Storage
Choose Storage -> Insert the MicroSD Card in the MicroSD Card reader of your PC. Then select it from your file browser.
Now you are ready to flash your MicroSD Card with the Debian image. Select WRITE to continue.
Once finished, eject the MicroSD Card from your PC.
Booting the Raspberry Pi with the Debian image
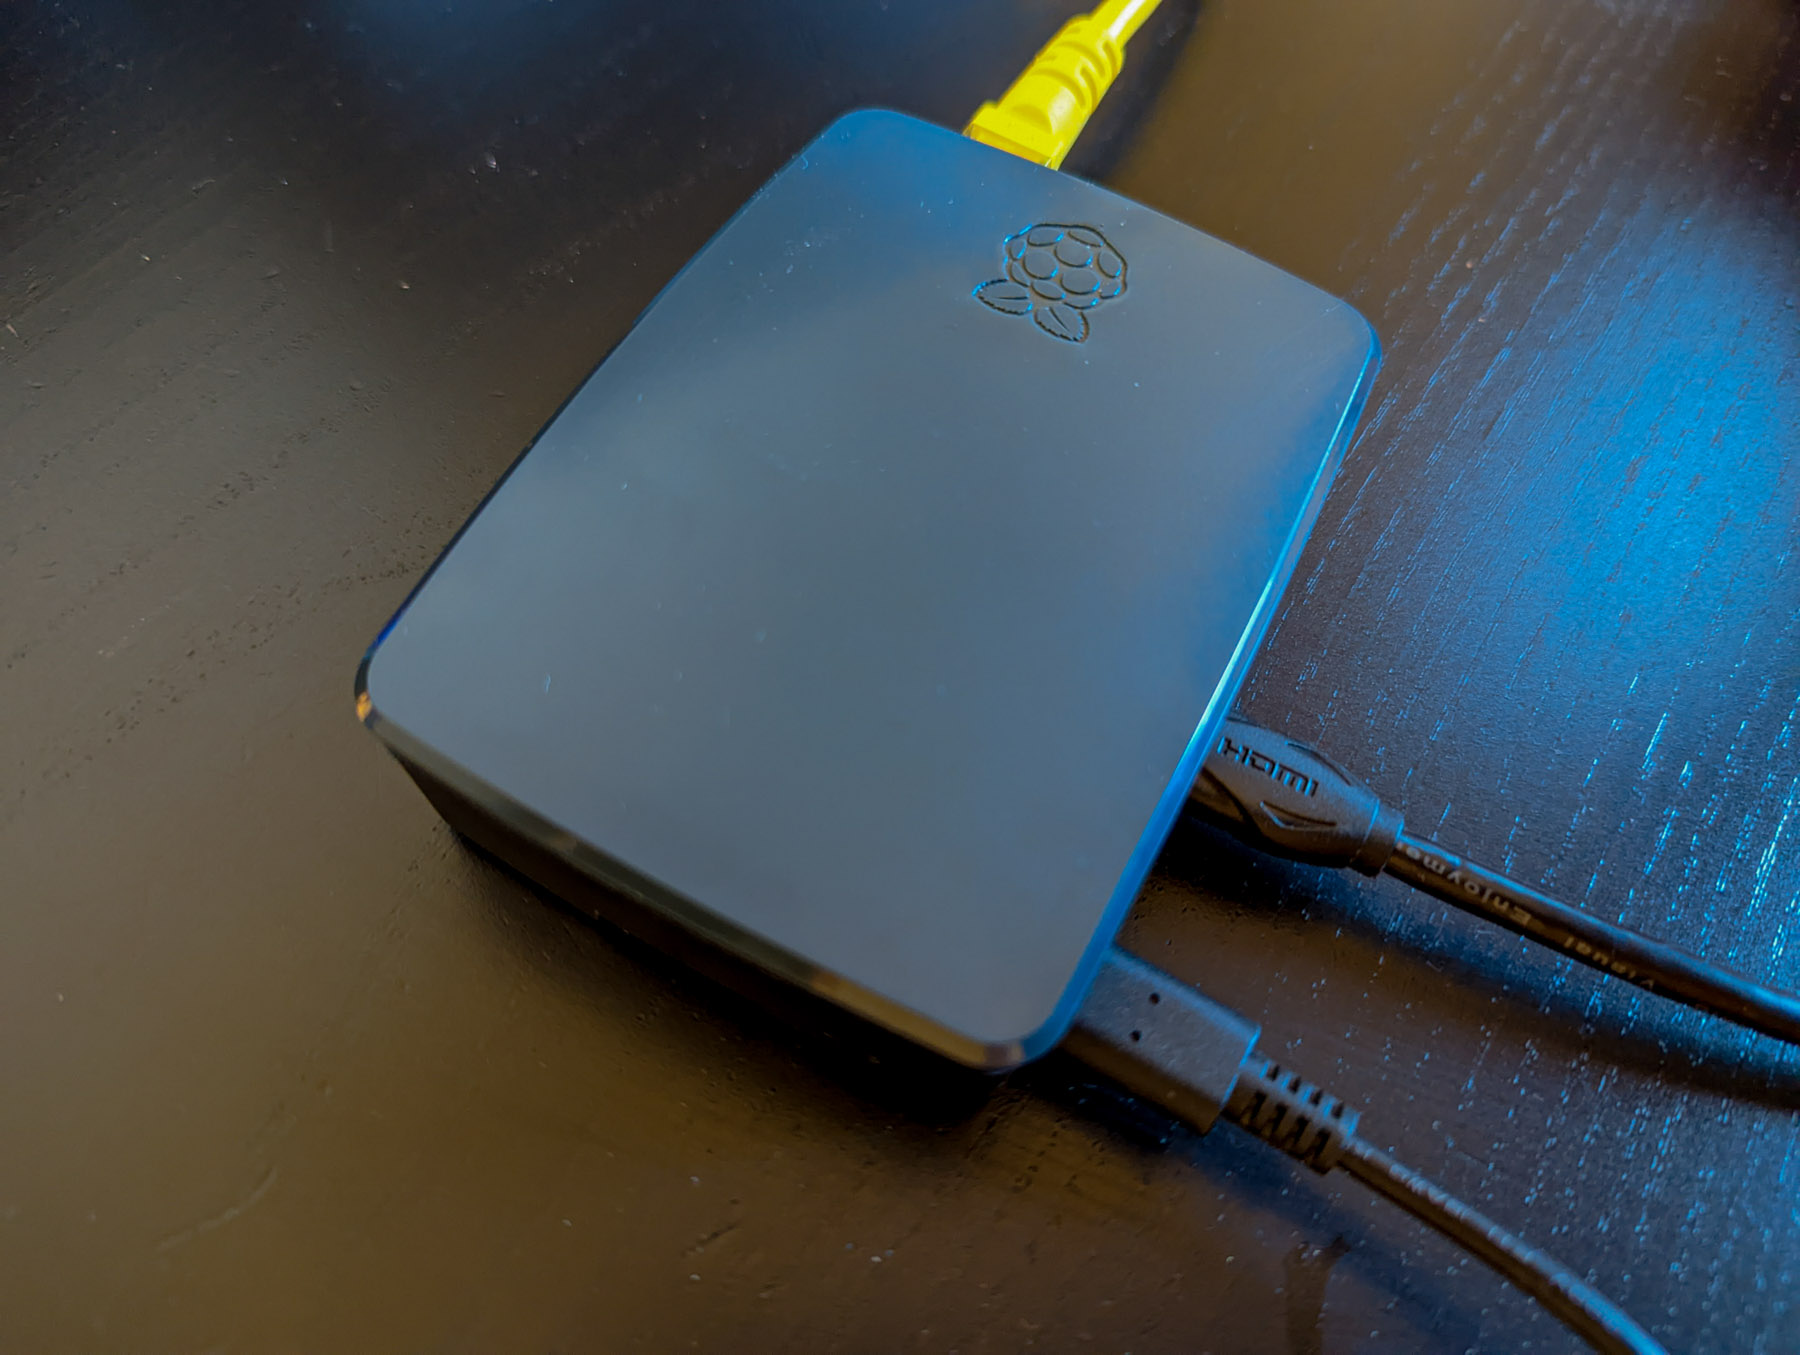
Before boot the Raspberry Pi, it should be prepared:
- Insert the MicroSD in the Raspberry Pi MicroSD slot
- Connect a scrren to the Raspbeery Pi using the Mini HDMI cable
- Connect the USB-A Keyboard to an USB-A port of the Raspberry Pi
- Connect the Raspberry Pi 4 to USB-C and the Power adapter
- Connect the RJ45 cable to the network port of the Raspberry Pi
Then you will have your Raspberry fully connectd and ready.
When the Raspberry is started the first time, you will be prompted for a login:
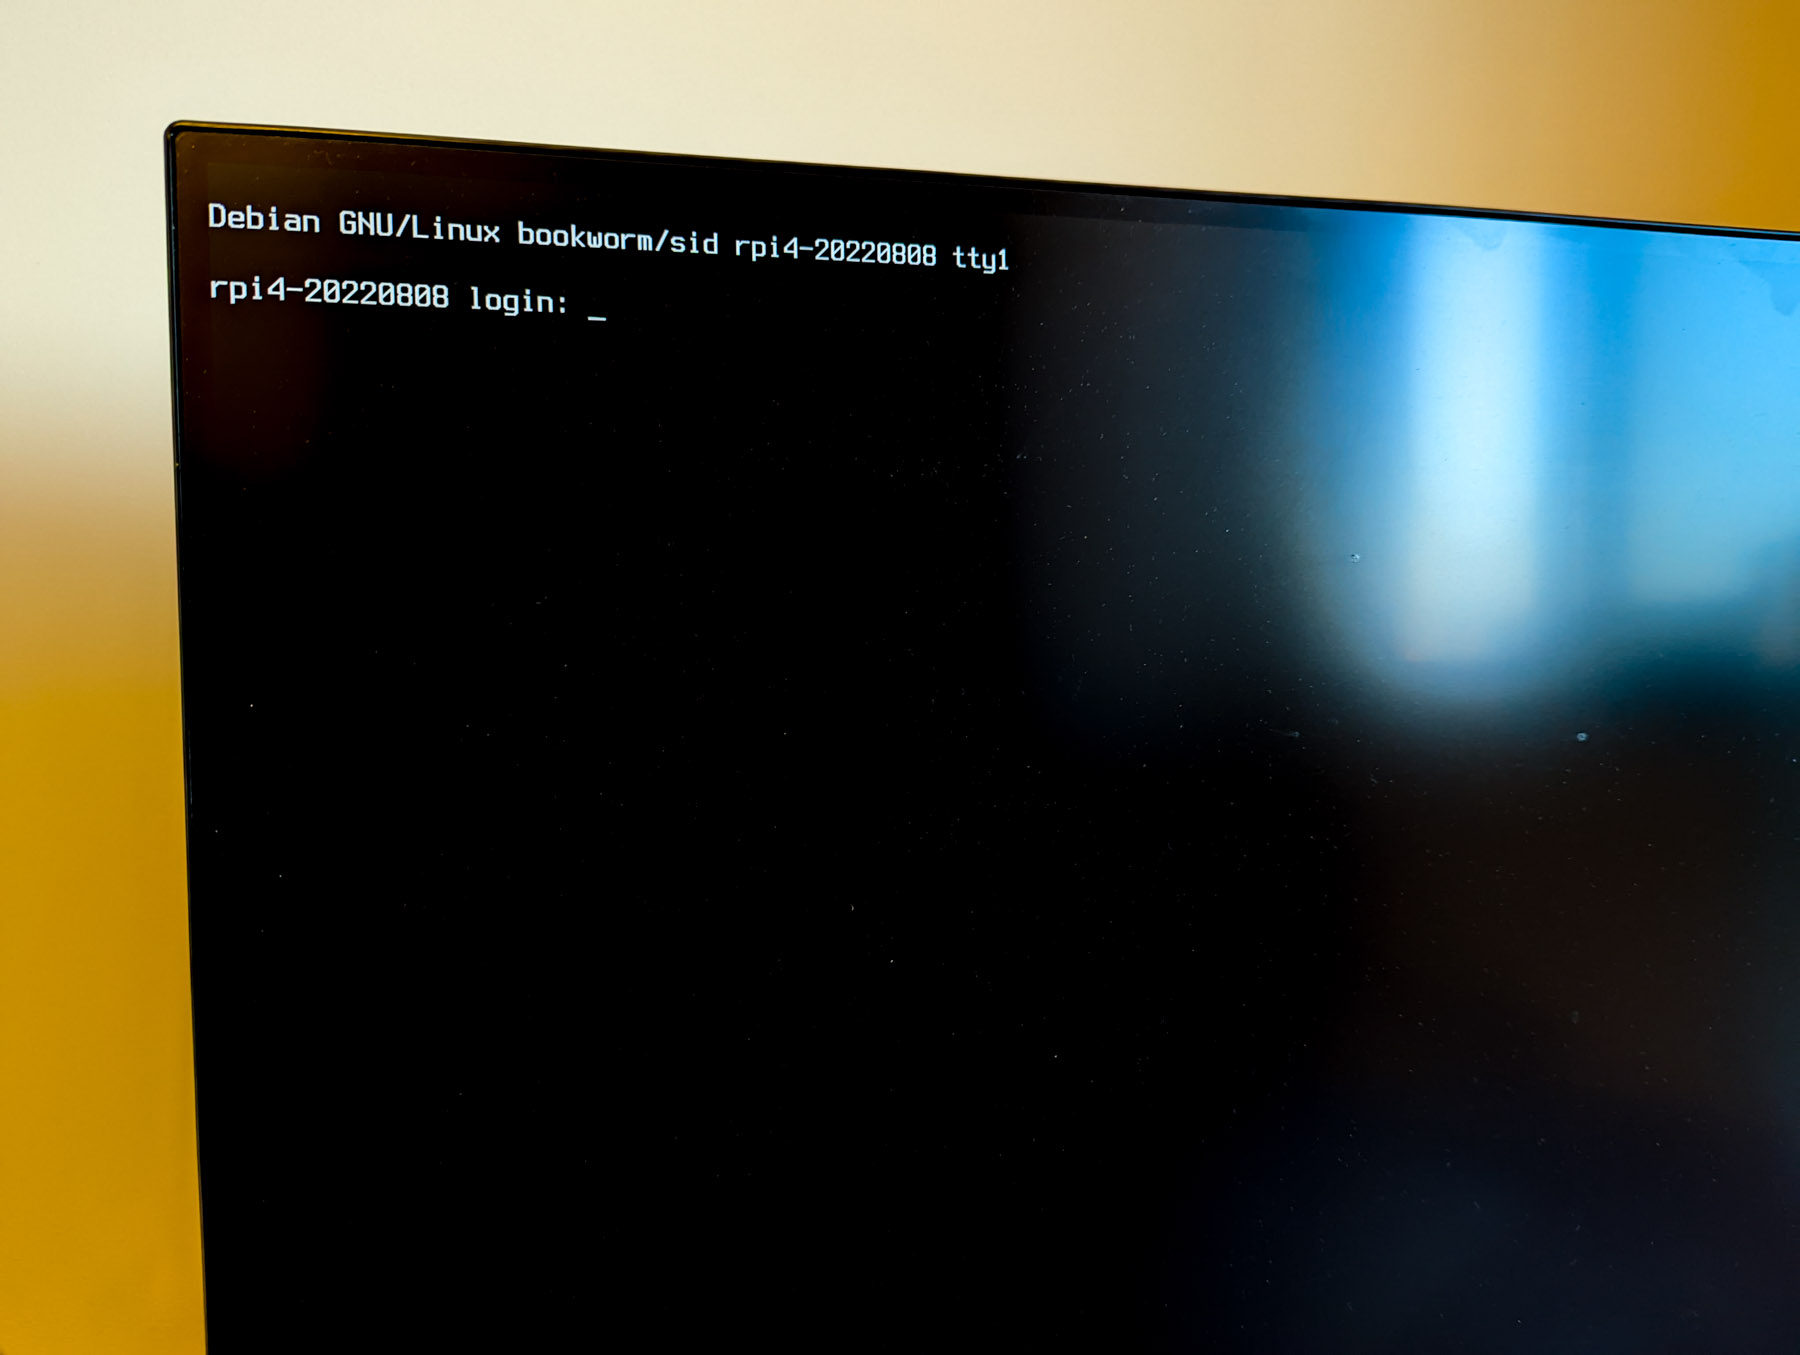
In this case as it is the first time, you shoud use the user root, and the system will give you a shell without asking for a password.
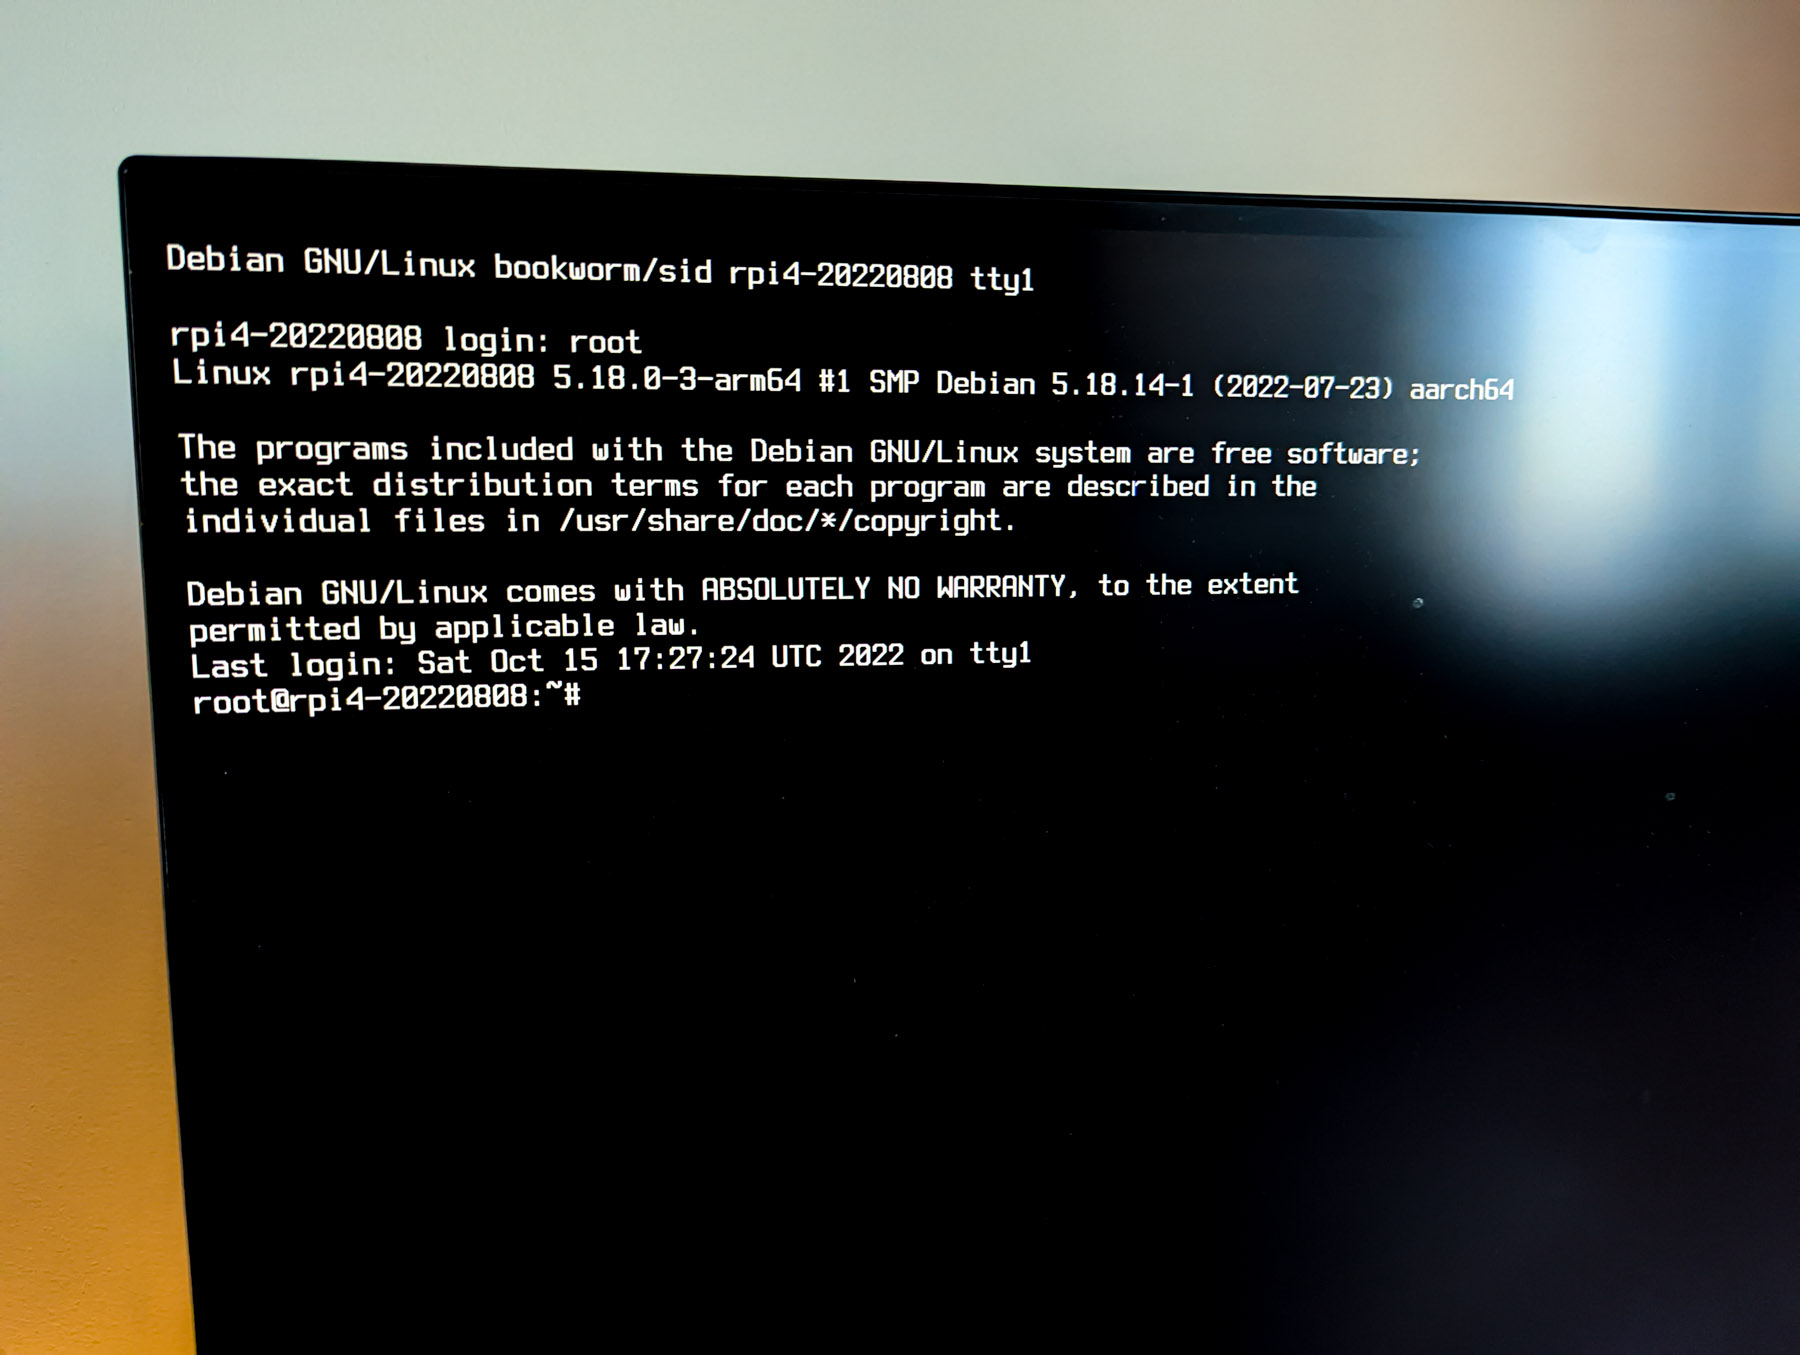
Now you are logged in your Debian system :-)
Change root password
For security reasons, I suggest to change the password of the root user as soon as possible. To change it use the passwd command.
# passwd
New password:
Retype new password:
passwd: password updated successfully
#
Connect using SSH to the Raspberry Pi
If you have DHCP protocol active in your router, your Raspberry will have a new IP address assigned. You could see it by using the ip address command.
root@rpi-20220808:~# ip address
1: lo: <LOOPBACK,UP,LOWER_UP> mtu 65536 qdisc noqueue state UNKNOWN group default qlen 1000
    link/loopback 00:00:00:00:00:00 brd 00:00:00:00:00:00
    inet 127.0.0.1/8 scope host lo
       valid_lft forever preferred_lft forever
    inet6 ::1/128 scope host
       valid_lft forever preferred_lft forever
2: eth0: <NO-CARRIER,BROADCAST,MULTICAST,UP> mtu 1500 qdisc mq state DOWN group default qlen 1000
    link/ether e4:5f:01:d9:eb:3a brd ff:ff:ff:ff:ff:ff
    inet 10.0.4.210/24 brd 10.0.4.255 scope global dynamic eth0
       valid_lft 83280sec preferred_lft 83280sec
    inet6 fe80::e65f:1ff:fed9:eb3a/64 scope link
       valid_lft forever preferred_lft forever
3: wlan0: <BROADCAST,MULTICAST,UP,LOWER_UP> mtu 1500 qdisc fq_codel state UP group default qlen 1000
    link/ether e4:5f:01:d9:eb:3b brd ff:ff:ff:ff:ff:ff
root@rpi-20220808:~#
In the eth0 interface the IPv4 which is assigned is 10.0.4.210, so using SSH with user root and the password previously set, you could now use SSH to connect to the Raspberry from your Local Network.
If SSH is working, you will not need screen or keyboard anymore, so you could disconnect and maintain the USB-C and RJ45 cables.
Conclusion
Your Raspberry now is working with a Debian OS. This is the first post about Debian in a Raspberry Pi in this blog, but I’ll continue posting more about this OS.
Enjoy!